Creating Retina Images for Your Website
July 6th, 2012 by Kyle J. Larson
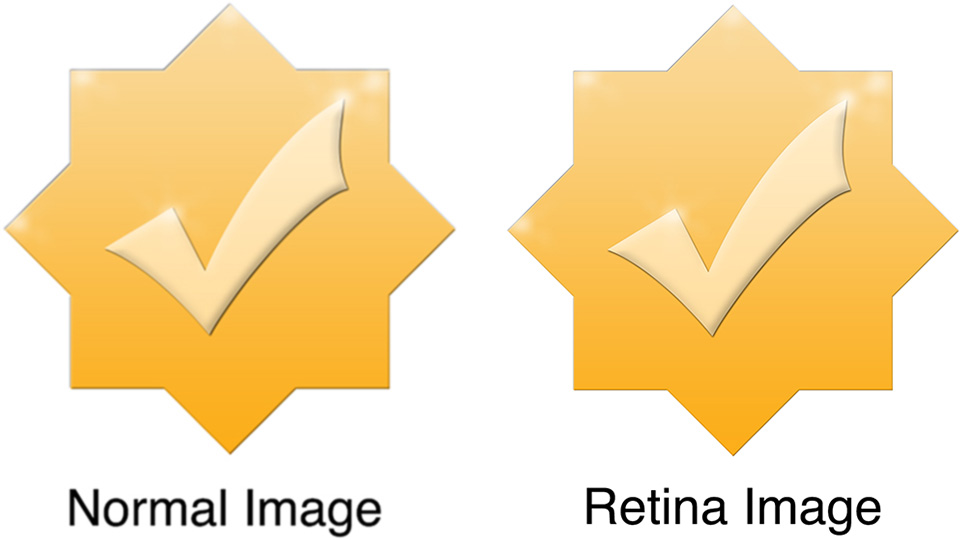
Apple’s newest devices feature the Retina Display, a screen that packs double as many pixels into the same space as older devices. For designers this immediately brings up the question, “What can I do to make my content look outstanding on these new iPads and iPhones?”. First there are a few tough questions to consider, but then this guide will help you get started making your websites and web apps look amazingly sharp with Retina images!
Things to Consider When Adding Retina Images
The main issue with adding retina images is that the images are double as large and will take up extra bandwidth (this won’t be an issue for actual iOS apps, but this guide is covering web sites & web apps only). If your site is mostly used on-the-go over a 3G network it may not be wise to make all your graphics high-definition, but maybe choose only a select few important images. If you’re creating something that will be used more often on a WI-FI connection or have an application that is deserving of the extra wait for hi-res graphics these steps below will help you target only hi-res capable devices.
Simple Retina Images
The basic concept of a Retina image is that your taking a larger image, with double the amount of pixels that your image will be displayed at (e.g 200 x 200 pixels), and setting the image to fill half of that space (100 x 100 pixels). This can be done manually by setting the height and width in HTML to half the size of your image file.
<img src="my200x200image.jpg" width="100" height="100">If you’d like to do something more advanced keep reading below for how you can apply this technique using scripting.
Creating Retina Icons for Your Website
When users add your website or web app to their homescreen it will be represented by an icon. These sizes for regular and Retina icons (from Apple) are as follows:
![]()
| iPhone | 57 x 57 |
|---|---|
| Retina iPhone | 114 x 114 |
| iPad | 72 x 72 |
| Retina iPad | 144 x 144 |
For each of these images you create you can link them in the head of your document like this (if you want the device to add the round corners remove -precomposed):
<link href="touch-icon-iphone.png" rel="apple-touch-icon-precomposed" />
<link href="touch-icon-ipad.png" rel="apple-touch-icon-precomposed" sizes="72x72" />
<link href="touch-icon-iphone4.png" rel="apple-touch-icon-precomposed" sizes="114x114" />
<link href="touch-icon-ipad3.png" rel="apple-touch-icon-precomposed" sizes="144x144" />
If the correct size isn’t specified the device will use the smallest icon that is larger than the recommended size (i.e. if you left out the 114px the iPhone 4 would use the 144px icon).
Retina Background Images
Background images that are specified in your CSS can be swapped out using media queries. You’ll first want to generate two versions of each image. For example ‘bgPattern.png’ at 100px x 100px and ‘[email protected]’ at 200px x 200px. It will be useful to have a standard naming convention such as adding @2x for these retina images. To add the new @2x image to your site simply add in the media query below (You can add any additional styles that have background images within the braces of the same media query):
.repeatingPattern {
     background: url(../images/bgPattern.png) repeat;
     background-size: 100px 100px;
}

@media only screen and (-webkit-min-device-pixel-ratio: 2) {
     .repeatingPattern {
          background: url(../images/[email protected]) repeat;
     }
}
JavaScript for Retina Image Replacement
For your retina images that aren’t backgrounds the best option seems to be either creating graphics with CSS, using SVG, or replacing your images with JavaScript. Just like the background images, you’ll want to create a normal image and one ‘@2x’ image. Then with JavaScript you can detect if the pixel ratio of the browser is 2x, just like you did with the media query:
if (window.devicePixelRatio == 2) {

//Replace your img src with the new retina image

}
If you’re using jQuery you could quickly replace all your images like this very basic example below. It’s a good idea to add a class to identify the images with hi-res versions so you don’t replace any others by mistake. I’ve added a class=”hires” for this example. Also make sure you have the standard (non-retina) image height and width set in the HTML:
<img class="hires" alt="" src="search.png" width="100" height="100" />
<script type="text/javascript">
$(function () {

	if (window.devicePixelRatio == 2) {

          var images = $("img.hires");

          // loop through the images and make them hi-res
          for(var i = 0; i < images.length; i++) {

            // create new image name
            var imageType = images[i].src.substr(-4);
            var imageName = images[i].src.substr(0, images[i].src.length - 4);
            imageName += "@2x" + imageType;

            //rename image
            images[i].src = imageName;
          }
     }

});
</script>
Server-Side Retina Images
If you’d like to implement a server-side retina image solution, I recommend checking out Jeremy Worboys’ Retina Images (which he also posted in the comments below). His solution uses PHP code to determine which image should be served. The benefit of this solution is that it doesn’t have to replace the small image with the retina one so you’re using less bandwidth, especially if you have lots of images that you’re replacing.
Website Optimization for Retina Displays
If you’re looking for additional information on creating Retina images, I’ve recently had a short book published called Website Optimization for Retina Displays that covers a range of related topics. It contains some of what is above, but also includes samples for many different situations for adding Retina images. It explains the basics of creating Retina images, backgrounds, sprites, and borders. Then it talks about using media queries, creating graphics with CSS, embedding fonts, creating app icons, and more tips for creating Retina websites.
article originally published April 6, 2012

45 Comments
Gompers
I see the “hires” class in the image tag of your last example but I don’t see where your javascript only targets that class.
Kyle Larson
Thanks for pointing that out. I missed adding it in when I was testing out the code. You can see it now in the updated version: var images = $(“img.hires”);
Cosmin
var images = $(“img.hires”);
GaryJ
It’s this bit:
var images = $(“img.hires”);
itoctopus
Hi Kyle,
I thought that Retina display is equivalent to Samsung’s Super AMOLED, where the level of detail is higher than the eye’s own resolution. Am I wrong?
Kyle Larson
It looks like these are similar in some ways. AMOLED appears to be a screen technology whereas the retina refers to doubling the pixels-per-inch. The phones using Super AMOLED, do have a higher pixel density so you should be able to detect it just like what I’ve described above as long as you have the pixel ratio set correctly.
Jeremy Worboys
Great article explaining how to implement retina images on websites. You should take a look at http://retina-images.complexcompulsions.com/ (disclaimer, I made it) as it takes care of everything except actually creating the images.
Kyle Larson
Thanks for sharing this Jeremy. That’s a great way to implement on the server without having to download both versions of the file.
Kyle Larson
Added your solution into the article above. Thanks again for sharing it.
Attila Tóth
Very nice!
Adam Smith
Hi Kyle,
Thank you very much for this; I’m developing a framework for WordPress and wanted to include Retina support. I was having a few problems getting this to work at first; Firebug was returning ‘$ is not a function’.
I found that running the jQuery in no conflict mode made it worked perfectly.
jQuery.noConflict();
jQuery(function () {
if (window.devicePixelRatio == 2) {
var images = jQuery(“img.hires”);
// loop through the images and make them hi-res
for(var i = 0; i < images.length; i++) {
// create new image name
var imageType = images[i].src.substr(-4);
var imageName = images[i].src.substr(0, images[i].src.length – 4);
imageName += "@2x" + imageType;
//rename image
images[i].src = imageName;
}
}
});
Thanks, Adam.
Kyle Larson
Hey Adam,
I’m glad that this was helpful. Thanks for sharing the solution to the issue you ran into, definitely useful for people running multiple scripts.
-Kyle
Charles Gallant
Thanks Kyle. For those who don’t want to implement a server-side solution (like Jeremy Worboy’s… which looks to be pretty sweet), there’s a tiny addition to the JS that can help:
if (window.devicePixelRatio == 2) {
var images = $(“img.hires”);
var imageType;
var imageName;
var initWidth;
var initHeight;
// loop through the images and make them hi-res
for(var i = 0; i < images.length; i++) {
//init dimensions
initWidth = $(images[i]).width();
initHeight = $(images[i]).height();
// create new image name
imageType = images[i].src.substr(-4);
imageName = images[i].src.substr(0, images[i].src.length – 4);
imageName += "@2x" + imageType;
//rename image
images[i].src = imageName;
//reset dimensions
$(images[i]).width(initWidth);
$(images[i]).height(initHeight);
}
}
This inits the height and width of the image before swapping out the src, and sets them back after the swap. This way, you don't need to add the width/height in html =)
Anthony
We just create a containing .div that is half the size of the retina image and make the image 100%. Everything else is done for you.
NotsimpleEnough
I’m confused… this seems like a really complicated way of making images on a webpage.
Let’s say that I have an image whose (original) resolution is 400 pixels wide and 240 pixels high, and I want it to appear crisp on an iPhone.
Why can’t I just reference the image in an HTML document with , since that would shrink the image by 2x?
Kyle Larson
Hey Notsimple 🙂 … yes, you could certainly do that. The examples in the article above target only devices that have retina screens so your site still loads quickly for the majority of visitors who don’t have these types of displays. In a site with many images you could be increasing the load time quite a bit by doubling the resolution. If you’re working with a few smaller images this wouldn’t be as much of a concern.
Dave Woodhall
Of course, this can be done, however your images would no longer be responsive.
Michael
How to act with images which don’t have @2x versions yet? Now all images which don’t have a @2x version uploaded are broken.
Kyle Larson
Hi Michael,
For any images that you don’t have a @2x version yet, you can leave off class=”hires” and the javascript will ignore those images. Then if you create the high-resolution image later just add the class back in.
Sam Sehnert
There’s an even better way to do this, server side. This method doesn’t even need PHP, so you’re using less resources, and still get the benefit of using less bandwidth. Check out the writeup:
http://www.teamdf.com/web/automatically-serve-retina-artwork/191/
Kyle Larson
Good solution, thanks for sharing it Sam. Hopefully in the future we’ll have a way to specify multiple images in html so the user/user-agent can determine which is the best to use for it’s display & speed.
Simon
You could use retinise.js its a really lightweight plugin and only serves up the one image instead of two: dahliacreative.com/retinisejs
Kyle Larson
Cool, good solution as long as js is enabled. Thanks for sharing it.
Simon
There is now a fall back for if JS is disabled.
Eiad Ashraf
Hello i have a question about this plugin. all i need to do is just add @2x of my image and that’s it?
David Seal
Thanks! Used this as a reference for adding retina support to my personal website.
Kyle Larson
Hey David. I’m glad it was helpful!
Eiad Ashraf
Super! i’ll try it.
Thanks
elchava
Awesome, thanks!
Troy McGinnis
Great write up. I started using retina.js (http://retinajs.com/) for my own projects but this is a great reference for doing it all yourself!
Jackie
Hey @troymcginnis:disqus your link has a ) so it’s giving a 404 error. You may want to separate the ) from the URL
Joyce Weiss
Thank you. I love the items that make me look better!
Amit Jain
extremely useful article on retina display, Thanks :), gr8 reference
Gavin
Thanks for the script it works well. Do you know a way if the large version doesn’t exist it reverts back to the small version? Is this easy to implement?
Kyle Larson
Hey Gavin, I haven’t had a chance to test this yet, but you could take a look at this to get started: http://stackoverflow.com/questions/16553174/test-if-a-file-exists-with-javascript
$.ajax({
url: ‘example.com/abc.html’, //or your url
success: function(data){
alert(‘exists’);
},
error: function(data){
alert(‘does not exist’);
},
})
I think you could use that inside the for loop and if the image file exists then change the name, and if not then leave as-is.
Greg Ledger
If I have a large image (like from iStock) and the pixel dimensions are 1900 x 1267 AND I need a final size of 420 x 300 (thus art-directed), do I crop it to 840 x 600 and resize that with css on the web page OR do I crop it at 420 x 300, then scale it up 200%, then again resize it with css on the web page.
Also I usually start with a print resolution of 300px. When I run an image through miniJPEG or TinyPNG, I get back a 72px image, so I don’t think I have to change the resolution at all before I compress it.
Thanks, Kyle (I came here because the post on PACKT publishing didn’t have a comment section.
Kyle Larson
Hey Greg, I’d crop/resize the image file to 840 x 600 and then resize via css (width: 420px; height: 300px;) or html ().
Yes you shouldn’t have to change the resolution DPI if you’re saving as a jpg or png. Everything should end up at 72 DPI for the web. That’s great that you’re using those compression tools too, that helps quite a bit making sure you’re not wasting bandwidth.
santosh kumar
Superb! I want to have this type of structure on my blog http://www.GoogleOnlineHelp.com can u explain me how to do it as i’m running by site on wordpress platform whether if any plugins are available to do so, pls send me details at the earliest possible
National Aquaculture Group
National Aquaculture Group NAQUA http://www.naqua.com.sa
Levin
Useful, thanks
Erik Pöhler
if an image has double the length and double the height, you get 4 times as much pixels. same goes for the dimensions it’s displayed at: it’s just 25% de size when you use half the physical length and height. simple maths.
Eva Smith
woow..something unusual..Great article for creating retina images in website..
Web Apps design and development http://www.ati-erp.com
Sunaina Nawaz
Wonderful Article!
I need help regarding retina ready website. I am confused is there any difference if can make a png format retina image with @2x expect of SVG format? also want to know how image will set width/height on different screen sizes.
Radu Andrei
Best article I’ve found on this subject. I used the javascript version and it worked like a charm.
Vizz.bob
Amazing Stuff !! very helpful !!