Building a Dock with CSS Animation
July 12th, 2010 by Kyle J. Larson
After seeing some interesting uses of CSS animation, I decided to make a fisheye dock using only html, css and some images.
Currently not all browsers will support the functionality, but it will function correctly in Webkit browsers (Chrome / Safari) and Opera. The latest full release of Firefox (as of the writing of this article) doesn’t support css transitions so it won’t have the nice fade effects.

Dock Setup
The first step is to create some transparent PNGs to use as images for the dock. Then add the images to a list and put the text for the image in a paragraph tag. I’m also adding a div tag that we’ll use later in setting up a text bubble.
<ul id="dock-container">
<li>
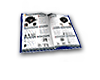
<a href="#"><img src="images/catalog.png" alt="catalog" />
<p>Catalog</p><div></div></a>
</li>
<li>
<a href="#"><img src="images/passkey.png" alt="passkey" />
<p>Login</p><div></div></a>
</li>
<li>
<a href="#"><img src="images/certification.png" alt="certification" />
<p>Certification</p><div></div></a>
</li>
<li>
<a href="#"><img src="images/mountbuilder.png" alt="mountbuilder" />
<p>MountBuilder</p><div></div></a>
</li>
<li>
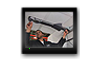
<a href="#"><img src="images/rackbuilder.png" alt="rackbuilder" />
<p>RackBuilder</p><div></div></a></li>
<li>
<a href="#"><img src="images/videos.png" alt="videos" />
<p>Video</p><div></div></a></li>
<li>
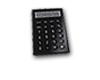
<a href="#"><img src="images/calculator.png" alt="calculator" />
<p>Calculator</p><div></div></a>
</li>
<li>
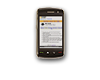
<a href="#"><img src="images/mobileSite.png" alt="mobile site" />
<p>Mobile</p><div></div></a>
</li>
<li>
<a href="#"><img src="images/savedProducts.png" alt="saved products" />
<p>Saved</p><div></div></a>
</li>
</ul>Next add some CSS to float the images in a horizontal line and lower their size in the default state so they don’t become pixelated when they are zoomed.
#dock-container {
     font: Helvetica, Arial, sans-serif;
     font-size: 12px;
}
#dock-container li {
     float: left;
     list-style-type: none;
     text-align: center;
}
#dock-container a {
     color: #ccc;
     text-decoration: none;
}
#dock-container img {
     border: 0;
     width: 75px;
}
Text Bubbles
Before we add the animations, we’ll stylize the text below the images to make them look like speech bubbles. The bubble is created using border-radius and the arrow using our first transform to rotate the empty div created above forty-five degrees.
#dock-container p {
     background: #000;
     border-radius: 8px;
     -moz-border-radius: 8px;
     margin: 0;
     position: relative;
     padding: 2px 4px;
     z-index: 100;
}
#dock-container div {
     background: #000;
     width: 10px;
     height: 10px;
     margin: 0 auto;
     position: relative;
     bottom: 20px;
     -moz-transform: rotate(45deg);
     -o-transform: rotate(45deg);
     -webkit-transform: rotate(45deg);
}
CSS Transitions & Animation
Now we’ll add the CSS to animate the menu. First we’ll define the transition that we’ll apply to all the animation effects on images and paragraphs so they fade (ease) both in and out. After that I’m going to define a transition specifically for the opacity transformation because I want it to show up much faster. Finally, we add the scale transformation to increase the size of any images by 1.4x within the link tag when its hovered over.
#dock-container img, #dock-container p {
     -moz-transition: all .4s ease-in-out;
     -o-transition: all .4s ease-in-out;
     -webkit-transition: all .4s ease-in-out;
}
#dock-container p, #dock-container div {
     -moz-transition: opacity .1s ease-in-out;
     -o-transition: opacity .1s ease-in-out;
     -webkit-transition: opacity .1s ease-in-out;
}
#dock-container a:hover > img {
     -moz-transform: scale(1.4);
     -o-transform: scale(1.4);
     -webkit-transform: scale(1.4);
}
Finishing the Text Bubbles
We’ve just about got a working menu now. The final step is just getting the text bubbles to display only when the links are hovered. To do this we’ll just add opacity of 0 to those elements and then change it to 1 when hovered. The transition we set in the last step will quickly fade it in and out.
#dock-container p, #dock-container div {
     opacity: 0;
}
#dock-container a:hover > div, #dock-container a:hover > p {
     opacity: 1;
}